CourseMCP Setup
The CourseMCP extension isn't in the extension stores yet, so to simplify things we've written a single script that will install the MCP server, and get you 99% of the way to having the browser extension installed.
Start with the installer- 01Run the installer
- 02Load in Chrome
- 03Import a course
- 04Authorize your agents
Run the installer
Open Terminal on macOS or Linux, or PowerShell on Windows. Paste the matching command and press Enter.
The installer verifies the extension, puts it in a stable folder, backs up any config it changes, and adds the CourseMCP endpoint to supported MCP clients. It never reads any credentials or does any authentication.
macOS and Linux
curl -fsSL https://coursemcp.com/install.sh | bashWindows PowerShell
irm https://coursemcp.com/install.ps1 | iexWhen it finishes: keep the terminal open. It prints the extension folder and the same Chrome steps shown below.
On supported computers it also opens chrome://extensions
and copies the folder path.
Load it in Chrome
-
1.Open
chrome://extensions. - 2.Turn on Developer mode in the top-right corner.
- 3.Choose Load unpacked.
- 4.Select the CourseMCP extension folder the installer opened.
- 5.Pin CourseMCP beside Chrome’s address bar.
The folder did not open
Select the folder for your operating system:
- macOS
- ~/Library/Application Support/CourseMCP/ChromeExtension
- Windows
- %LOCALAPPDATA%\CourseMCP\ChromeExtension
- Linux
- ~/.local/share/coursemcp/chrome-extension
Chrome shows a developer-mode notice because this private build is not installed through the Chrome Web Store. Keep the extension folder in place after loading it.
Sign in and import
- 1.Open a course you are allowed to import in Canvas.
- 2.Open CourseMCP from Chrome’s toolbar and sign in.
- 3.Review the data-use notice and choose Import this course.
CourseMCP asks for access to that Canvas site only when you start an import. It does not automate login or collect grades, submissions, or messages.
Restart and authorize
- Restart the MCP clients you use so they pick up the new configuration.
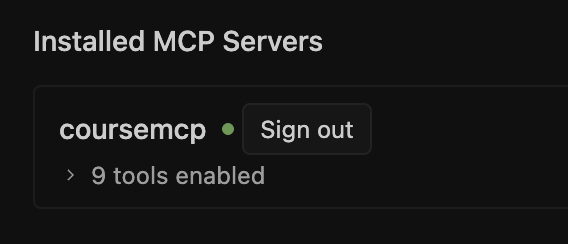
- Authorize CourseMCP when your client prompts you, or open its MCP settings to sign in. Authentication starts in your client after installation.
- Try a question such as “Use the CourseMCP tool to summarise the latest lecture for my course.”
Manual installation
Install the Chrome extension manually
- 1. Extract the ZIP into a permanent folder.
-
2.
Open
chrome://extensionsand turn on Developer mode. -
3.
Choose Load unpacked and select the extracted folder containing
manifest.json. - 4. Keep that folder in place so Chrome can continue loading the extension.
Connect the MCP server manually
Add a remote Streamable HTTP server named coursemcp with this endpoint:
https://coursemcp.com/mcpCodex
codex mcp add coursemcp --url https://coursemcp.com/mcpcodex mcp login coursemcp --oauth-client-registration autoClaude Code
claude mcp add --transport http --scope user coursemcp https://coursemcp.com/mcpAntigravity
In ~/.gemini/config/mcp_config.json, add coursemcp
under mcpServers
with serverUrl
set to the endpoint above.
Cursor, VS Code, Windsurf, or OpenCode
Open the client’s MCP settings, add a remote HTTP server named coursemcp, and paste the endpoint above. Restart the client and complete its OAuth prompt.
Run the installer without installing the extension
Useful if you installed the Chrome extension manually and only want the script to configure your MCP clients.
macOS and Linux
curl -fsSL https://coursemcp.com/install.sh | bash -s -- --skip-extensionWindows PowerShell
& ([scriptblock]::Create((irm https://coursemcp.com/install.ps1))) -SkipExtensionThat’s the whole setup.
Sign in, import your first course, and start asking questions with the source attached.
Stuck on a step? Email hello@coursemcp.com and tell us where you got up to.